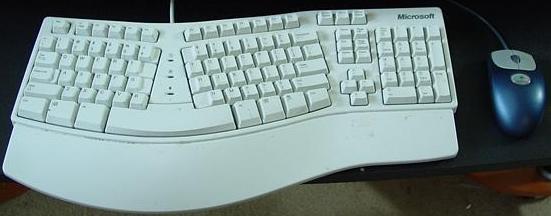
It's always bothered me to have the numeric keypad on a keyboard. I write programs and prose, but I never enter in columns of numbers. Are there still people who do this? I thought computers were supposed to liberate us from that sort of thing. Anyway, this vestige of adding machines had to go! It forces the mouse to be about 3 inches farther away from where I'm typing than it needs to be, which adds up to a lot of unnecessary arm movement over the years. So I set about to chop the numeric keypad off the otherwise excellent Microsoft Natural Keyboard. It worked well (on my second try) and took about two hours.
Unfortunately, you can't just saw the right side off because a number of wires run around the outside edge of the big circuit board under the keys. On my first attempt, I cut all the components on the right side and about 1/3 of the keys didn't work afterwards.
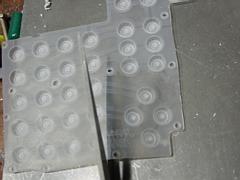
Modern keyboards have a sandwich of 2 flexible mylar sheets with wiring printed on them, and a third layer of thicker plastic between. The middle layer has holes punched where the keys go. The keys press down on the top layer and bulge it down slightly to contact the bottom one, setting off a long chain of events that result in a letter appearing on the screen.
The good news is that the mylar circuits are flexible and can be bent back behind the keyboard rather than cut. So, get out your tools, unplug your keyboard, and let's begin. You might want to make sure you have a spare keyboard around in case it doesn't work.
Step-by-step instructions
You first have to disassemble the keyboard. Take the bottom off by removing several screws.

Remove all the layers of mylar. In my keyboard, they were held on by some plastic posts going through holes in the mylar. The posts had been squashed down by a hot tool. I was able to wiggle the mylar off the head of the post, but you might need to trim the mushroomed plastic off using a knife.
Now remove the keys. In mine, there were 3 separate key units: left hand, right hand, and the direction/editing/numeric keys. They came out quite easily.
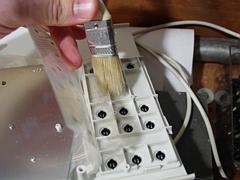
Do you sit there all day eating crackers and scratching your dandruff over your keyboard? Take this opportunity to clean it up.
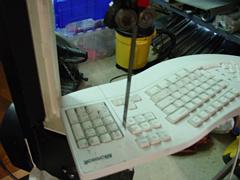
Now, the fun part! Reassemble the top and bottom halves without the keys or mylar circuits. Then run it right through a bandsaw. I marked the path with a flexible ruler and pencil, then went for it. Remember, all the wiring is removed.
I'm sure you could also do this with a hacksaw. The plastic is very easy to cut. If you're cutting the top and bottom separately, make sure to mark the cutting line clearly on both before you start.
Ta-dah! The right side is gone.
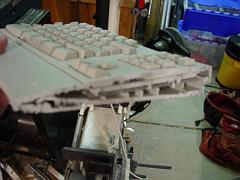
The cut you get is fairly rough, so you should clean it up. I used an exacto knife to trim the burrs from the edge, and then a file to smooth it out and round off the corners. Then trim the burrs again.
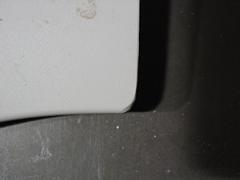
Rounding the corners adds a lot to the appearance. Just a few strokes with a file will do it.
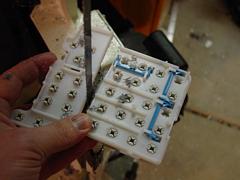
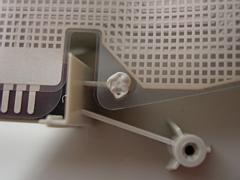
On the second keyboard I modified, I removed the 3 banks of keys and cut the right side key group separately. I wanted to cut this exactly to avoid cutting off the pins which hold the springy sheet in place.
The springy rubber sheet also has to be cut separately, with very sharp scissors.
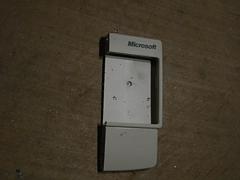
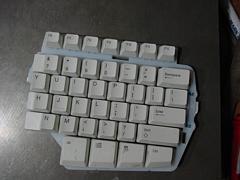
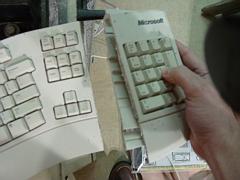
The offending part has been removed. As a special bonus, the manufacturer's logo goes with it.
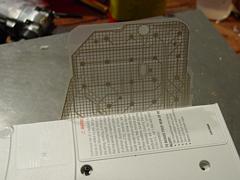
Now, reassemble the whole thing. Since you haven't cut the mylar printed circuits, they'll stick out on the right.
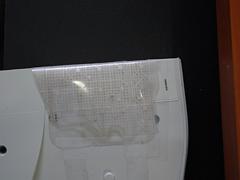
To get them out of the way, I bent them back under the bottom of the keyboard. I found that the middle sheet was fairly thick and hard to bend, so I cut it away. But the wiring on the outer sheets cannot be allowed to touch, so I applied a layer of scotch tape to the bottom side of the top circuit board in order to insulate them.
I was worried about having all kinds of ugly wires dangling out of the side, but the result is fairly clean looking.
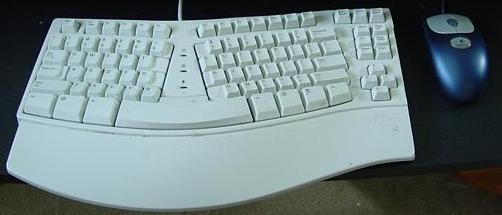
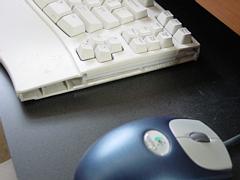
The Final Result

I'm now trying to retrain my hands to keep the mouse closer. I find that I naturally end up keeping the mouse in about the same place as always, far to the right of the keyboard.
This, though, is way cooler